How to make a Spirit Level
Spirit levels are one of those handy tools that everyone should have. Long ones are great as straight edges, short ones hang around in your pocket for those quick laying out checks - as long as they actually show a true level. The plastic ones only cost a few bucks at the cheap shops, but nothing beats the beauty of a well made wooden one.
I have come across many old spirit levels that are broken or warped - but still have good parts on them. So, a while ago I bought one for a dollar and thought "I'll have a go at that one day". Surprisingly, one day actually came and here is the story.
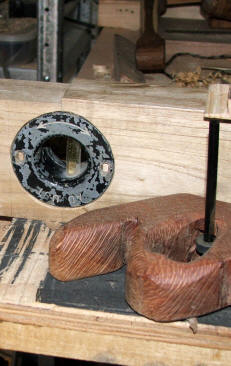
Stripping the parts of the old level
The old level was made of wood, so stripping the parts was easy, but some of the parts were in worse repair that I realised. The holders for the glass vials were made from cast aluminium, and one of them was badly broken and corroded. The glass vials were still intact however, so all was good.
Cutting out the blank
I had aquired a piece of Catalpa that I had seasoned for the past year. Catalpa is a very pretty wood, and even though it is rather light, my piece was about the right size for a short 'torpedo' level, and the old level had aluminium plates for the corners where the most wear is to be expected. so again, all was good.
The Catalpa was an offcut from a branch, so step one was to cut a flat face. I had restored an old rip saw a while back and needed some exercise, so exercise I got. After I had trued the face with a handplane, I cut out the remaining faces. (I am fortunate to possess an old radial arm saw, decided that I had had enough exercise for the day, and cheated).
I set the width of the blank to match the old level so I could reuse the old toe plates. I also made the height the same as this looked about right, and ensured that the old hardware would fit ok. Cutting the blank requires care to make sure that each face is exactly parralel and square, and a well adjusted power saw is invaluable for this.
Marking out and cutting
Marking out is as simple as finding the centre lines on both the narrow and wide faces, and working out where the bits fit best. Then trace the parts you have rescued.
I used a spade bit in a drill press to drill a recess for the face plate of the horizontal spirit vial, and then cleaned up the job with my router plane and a chisel. I also used this process to fit the toe plates to the stock. I then roughed out the slot for the vial with a smaller spade bit, and again used chisel and router plane to clean it up.
The next job was to rebuild the holder for the horizontal vial. I used scraps of macadamia wood (quite strong but still flexible) and drilled out two end blocks which I glued to the bed plate. I glued the vial in place with epoxy putty, but silicon would also have worked well. The mechanism is screwed into the slot with springs under the holder to permit adjustment. Finally, I used a holesaw to cut out the hole for the vertical vial, and an electric router to rout out the recess freehand.
I installed the toe plates, and then made several passes with an electric saw to round off the ends. (Electric saws will cut aluminium ok if you are VERY careful - the biggest problem is that the aluminium sticks to and cloggs the teeth). A final sand and coat of linseed oil and the level is finished.
Adjusting the level
Adjusting the vials is as simple as setting the level on a surface, adjusting the vials, and then flipping the level 180 degrees. If the bubble stays in exactly the same place, then the surface is level and the level is true.