How to make 3 different types of marking gauge
This project describes the construction of three different styles of marking gauge, and comments on some of the issues I encountered whilst building and using them.
Gauges can be armed with pencil, pin, or knife; and can scribe a single or double line. The pencil is a handy, removable mark but suffers from leaving a fat line, which can lead to inaccuracies when laying out very precise work such as joints. The pin and knife gauges improve on this by leaving a very fine mark, with the knife being less inclined to follow the grain when gauging parallel to it, and the pin generally being easier to use across the grain of the wood.
Cutting out the blanks
The actual dimensions don’t matter a lot: the face should be wide enough to accommodate your chosen locking mechanism, big or small enough to fit your hand and the bar should be long enough to suit both your work. Having calculated the ideal dimensions, adapt as necessary to suit your offcuts bin.
To make your gauge, first select your wood, flatten/smooth the working face, and then cut the face plate out. I had some rough sawn Macadamia wood that was a bit warped, so I cut an oversized blank first, tried it with my hand plane, and then trimmed it to final size.
Cut out the material for the bar while you are at it. The shape and size don’t matter a lot as long as it can be held securely in the face, and can be mounted with your chosen marking weaponry. A bar of 20 to 30cm long is common.
Cutting the mortise
It does not matter where you actually locate the mortise provided that the face projects below the bar enough to act as a firm guide, and there is sufficient thickness of wood above or beside the bar to accommodate your locking mechanism.
To cut the mortise, first, mark the centre lines on both sides of the face. It is probably better to use a try-square to extend the lines around the face plate, as any error will be visible as a gap where the lines meet back up at the end. My preference is to locate the bottom of the mortise on the horizontal centre line. Measure the dimensions of the bar, and mark the mortise on the working face. Use a try-square to transfer the marks to the back of the face, and continue the lines all the way around to see the closing error and confirm that the two marks are exactly in line.
I used a mallet and chisel to cut out the first mortise, a scroll saw to cut out the second, and a bow saw to cut out the third. The chisel was the slowest method, but permitted me to creep up to the exact measurement and resulted in a good fit. It was however jolly hard work, as Macadamia is quite hard. The scroll saw did not cut parallel, and I had to shim the mortise to tighten it up (see photo) – but this may have been due to my choice of blade. The bowsaw is my favourite method, with the mortise fitting almost perfectly straight off the saw.
To use a bowsaw (or coping saw), first drill a large hole in the centre of the mortise, and making sure that the hole stays entirely inside the waste area. Insert the saw blade and begin the cut, but once you are on the line, angle the saw so you are only cutting on lines you can see. Then turn the face around and complete any remaining cuts. (This avoids the possibility of cuts not being exactly parallel or going too far). Once cut, the mortise can be tidied up with a chisel or file. (You can make a suitable ‘file’ by stapling or gluing coarse sandpaper to a piece of wood).
Creating the locking mechanism
My first gauge uses a tapered pin, my second uses a screw, and my third uses a tapered wedge. The tapered wedge was the easiest to make (using a bow saw), and fitted straight off the saw. I did however cut the wedge at too steep an angle, and need to wedge a piece of sandpaper into the mortise to get it to hold securely. (In future I would cut the taper at about 1mm per 10mm).
The screw mechanism is probably the simplest to make. I cut a thread onto a metal rod, drilled a slightly undersized hole in the handle, and then drilled and tapped a fractionally oversized hole in the top of the face plate. I waxed the thread so it would turn more easily and made a leather washer to sit between the screw and the wood. It holds the most securely. You can make a thread tap by filing a slot or two into the end of a bolt if you don’t have a proper one.
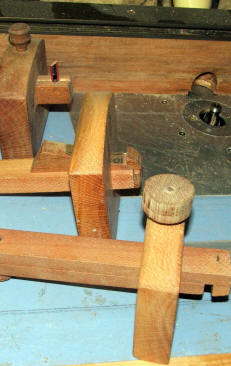
The tapered pin is the most fiddly to create, but is my favourite, as it holds well, is easy to adjust, and looks good. To make it, I drilled a hole at a very slight angle into the side of the mortise (see photo), and then drilled progressively shallower holes with progressively bigger drills until I had a hole that was a stepped taper. I then reamed and sanded it out until it was relatively smooth, and then turned up a pin to suit.
A mechanism that I have not yet tried is a cam lock pin. To make it, drill a hole so that it breaks into the side of the mortise (about ¼ to 1/3 of its diameter). Insert a wooden pin or dowel, and file it so that it is flush with the side of the mortise. Remove the pin, and finish filing the cam to shape. Then assemble everything, and turn the pin to lock it in place. I suspect that this will be easier to make than the tapered pin.
Making the marking weaponry
Pencils are easy to mount, and all I did was to drill a hole that was a bit too small, cut a slot through the hole so the bar will grip the pencil like a clothes peg, and cut the pencil to suit.
The knife was made from a piece of high carbon rod that I salvaged from an inner spring mattress (the ~6mm round bar that formes the upper edge of the mattress). File the end to shape, heat it till it is cherry red, then drop it in water to harden it (a gas stove is hot enough to do this if you are careful. It will be too hard to use at this stage, so gently heat it again until you can see a light yellowish colour appear on the shiny surfaces, and then cool it and sharpen it. If the cutting edge goes blue, it has softened too much, so reharden it and try again. You can also use a piece of hacksaw blade if you wish.
The pins were made from a spring. First, heat the spring untill it begins to glow and then allow it to cool slowly. This removes all stiffness, and the wire can now be straightened easily. Next, heat the wire to cherry red and dunk in water to harden it. Polish it till it is showing silver metal again, and reheat gently until the metal begins to turn slightly yellow (blue means it is too soft, so try again). Then snap off pins at the required length, sharpen them, and drill/glue them into the bar.
Random comments
I made the pin gauge to be both a single and a mortise gauge. Insert the double pins first, push the bar all the way home, and then mark where you should put the single pin.
I also found that rounding off the bottom corner makes the gauge fit my hand a lot better.
I made the pins from a spring and the knife from the inner-spring mattress steel because 'spring' steel contains enough carbon to enable hardening and tempering. You could use any high carbon or tool grade steel. I also found that a normal gas stove was hot enough to harden small bits of metal such as these. Read 'Hardening and tempering engineers tools' if you want more information on this subject.
To finish them I use a coat or two of boiled linseed oil followed by a wipe down with candle wax softened with turps.
I chose to make the pin and knife gauge in addition to the pencil gauge rather than making additional bars for the original face. This allows me to mark both temporary and permanent gauges lines without having to reset everything. The dual purpose pin gauge does require readjusting the face to to swap function, but does not usually require the mortise dimension to be altered. I have not yet found this to be an issue.
Using the gauges is simply a matter of aligning them and locking them off. The mortise gauge can be set to the exact centre of a piece of timber by gauging from both sides of the timber, and adjusting the bar until there is only one set of marks. The width of the mortise can be set to the size of your chisel, or to the size of the tennon (cut the tennon first, and then adjust the pins until the tips touch the edges).
Happy Woodworking.